Friday, July 17, 2015

Yarny Tote

Morning All!

I've been working the last few days on something I've been putting off for over a year now--a yarny tote!


Originally, I planned to up-cycle this thrift store find with deep red crochet roses.  After spending an hour making three roses and knowing I was going to need tons more, I gave up on the idea.  The roses found another home, and the bag, well, it just hung out in my closet.  This week I decided to give it another go and I am so happy with the results!!

Here's what I did.

I started out making sunburst granny squares following THIS  pattern from the Bunny Mummy Blog. It is a fantastic photo tutorial I have used before. I just love it!  I would lay out the squares onto the tote as I went to get a gauge as to how many squares I needed.  I ended up making 30 squares and I joined them as I went using THIS join as you go method found on the Attic24 Blog--another favorite of mine.  


At this stage, I added two granny stripes on each of the longer sides to finish and neaten up those edges. The first stripe was easy as I just tied on my yarn and started making that little granny triplet of double crochets in each space.
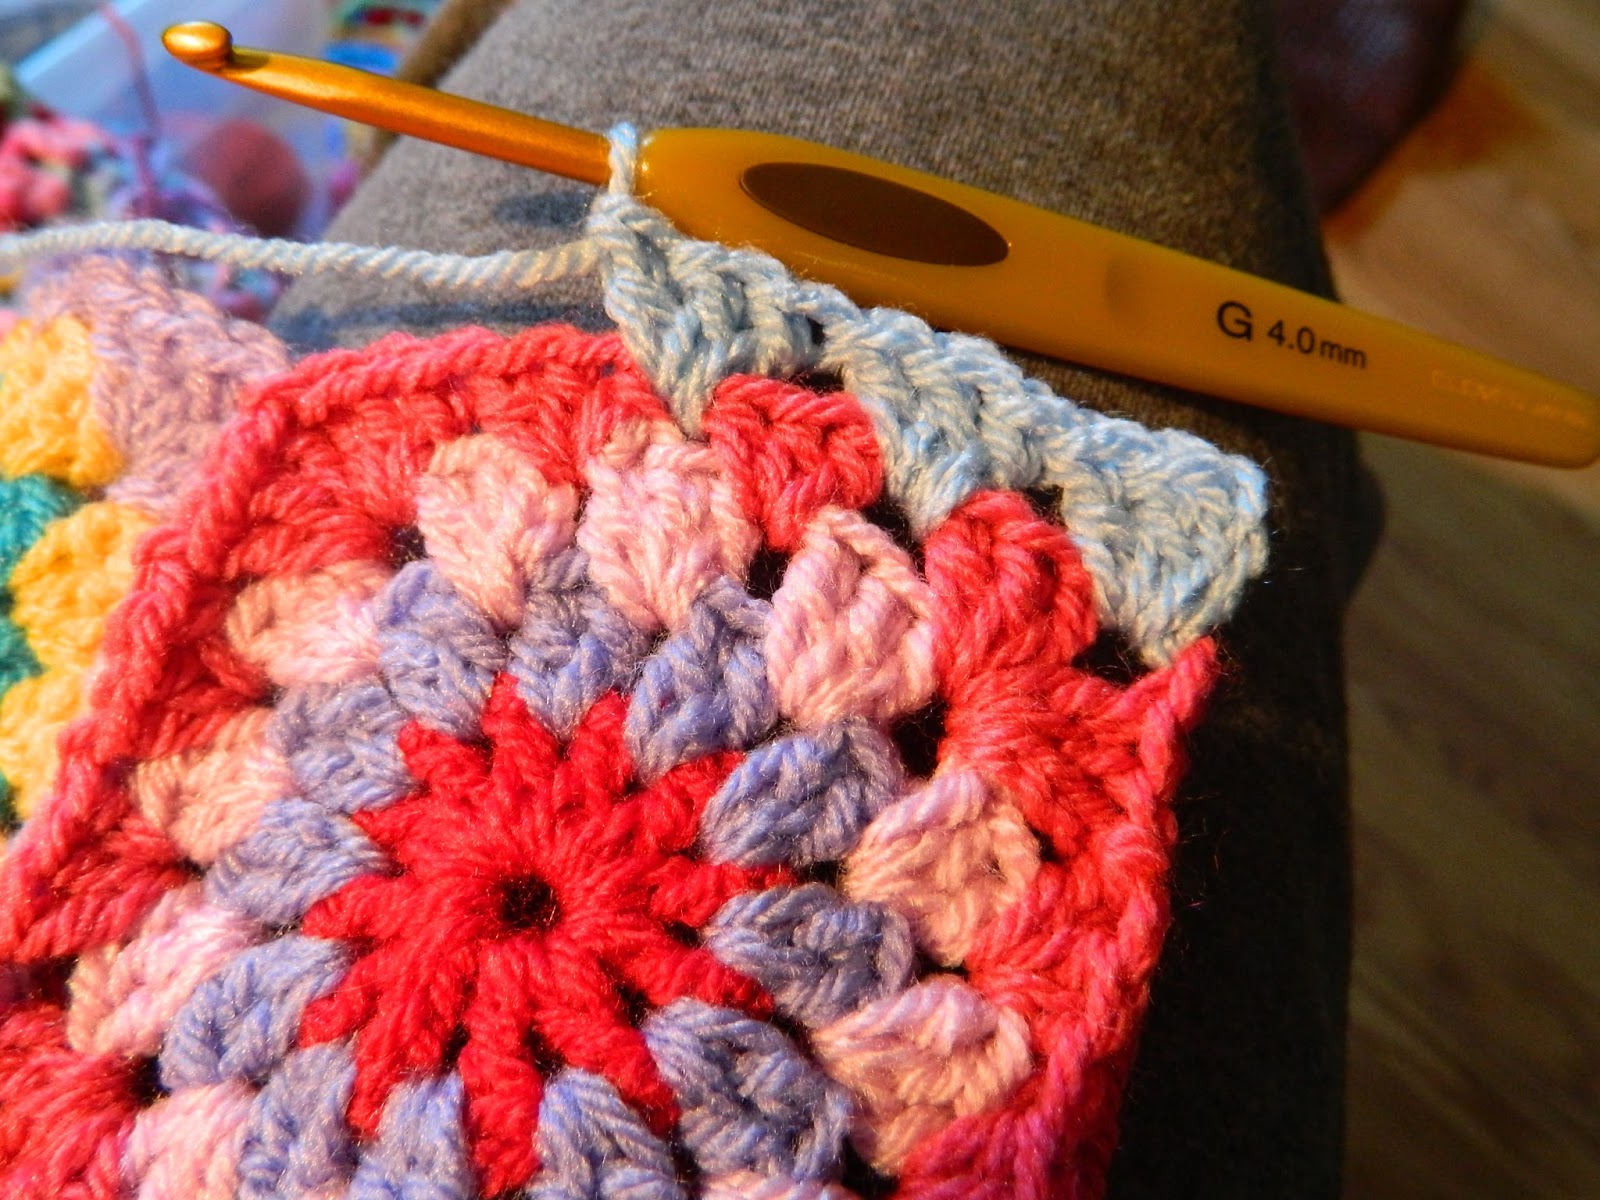

Once I had the blue stripe on each side, I added a red stripe.  This one wasn't hard to add, but I had to think about what I was doing to make it even and visually pretty!

I tied on my yarn in the space between the first two double crochets.


I then chained five.  My thinking was the first three would count as 1 double crochet and the remaining 2 chains would account for the the yarn space needed to get me to the opening between those two granny clusters.


I figured right and just crocheted away.  When I got to the end, I used the same logic as in the beginning but in reverse.  I crocheted that last granny cluster, chained 5 and then slip stitched between the last two double crochets.


Once this was all done, I was ready to sew the crochet piece to my bag.  I settled in at the dining room table with the bag, crochet, needle, and thread and started sewing the crochet to the top of the bag.
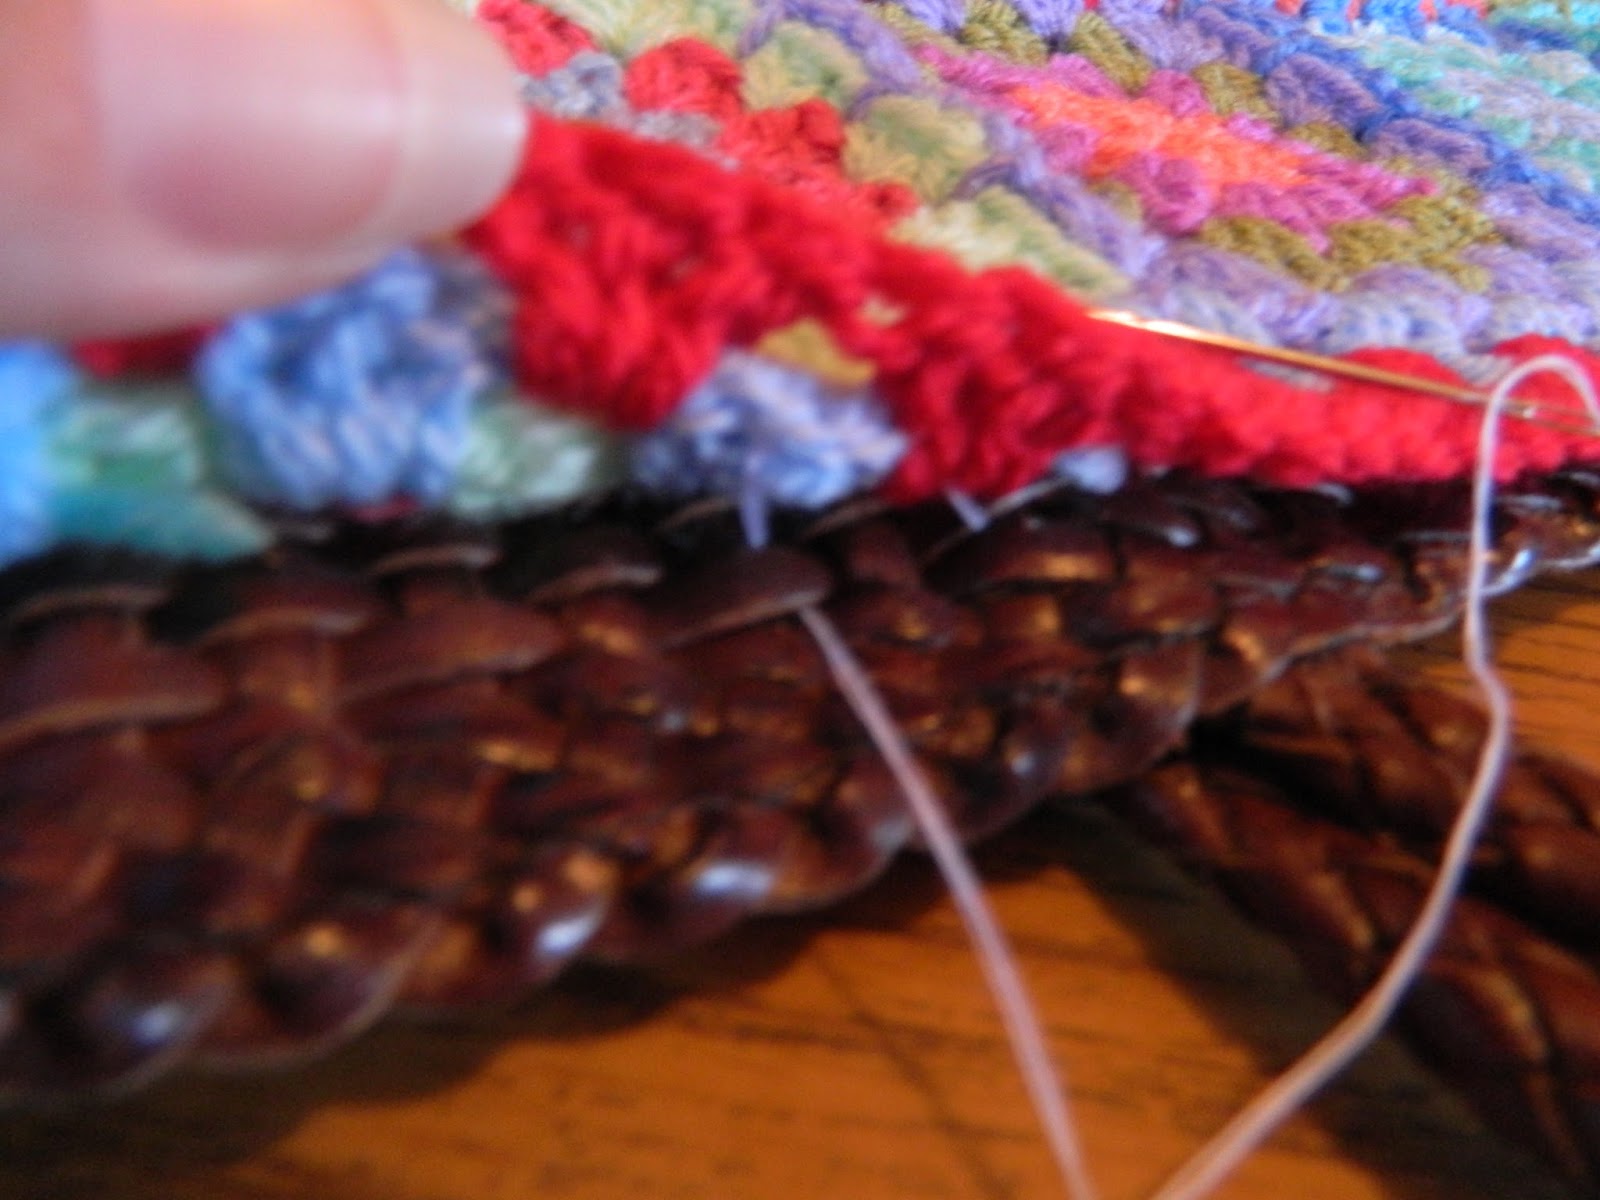

My bag is an  L.L.  Bean woven purse found at the local Goodwill store for $7.00!  The weave of the bag made it easy to sew on the crochet piece.

Once I sewed the crochet all the way around, I  sewed up the side making sure to match up stripes and squares.  To do this, I folded over the crochet piece so that the wrong side was facing out and I used needle and thread to sew it up.


Hopefully this shows what I mean by what I just typed!!

After this was done, I contemplated how to tack down the bottom of the purse.  I first decided to add another round of granny clusters to finish off and neaten up what I had sewn together and then decided I wanted to go ahead and cover the bottom.  Again, I put my thinking cap on to figure what to do.  With no results, tired eyes, and a sore back from hunching over that table, I went to bed!

When I woke up, it dawned on me. . . decrease, decrease, DECREASE!!!!  Probably not a novel idea, but it was for me.  After a cup of coffee I got started.

I began by tying on my yarn and instead of starting with a granny cluster, I did what I call a decrease. It's the same method I use when adding that first row of edging to a granny blanket.  The method can be found HERE.  Again, I have to credit Bunny Mummy Blog for this.


This just shows the steps I took, but it is explained very well in BM Blog.

I slip stitched at the end of the row and fastened off.


I followed the same method for each round making sure to start a new round in a new location:  I did a decrease at the beginning, crocheted around, slip stitched and fastened off.  In the picture below you can see the blue decrease is in the upper left hand corner and the yellow decrease is in the upper right hand corner.  That's what I mean be starting in different places.  After a few rounds, the bottom wasn't "closing" as much as I wanted it to, so I went on decrease overload.


This is what the bottom ended up looking like.  Once I started with the purplish yarn I crocheted a decrease, 2 normal granny clusters, a decrease, 2 normal, etc. until I made the round.  That still wasn't doing what I wanted SO the next round I decreased every other cluster.  I was getting there!  The LAST round I made I decreased every time and it pulled everything taut and did exactly what I wanted.  Knowing what I know now, I would decrease more each round instead of saving for the end.

I finished off the top of the bag by tying on the red.  Between each cluster I made a single crochet, chained three, single crochet, all the way around. 


I did this twice which is what's shown above, except on the second round, the single crochet was made in the previous chain, then chain three, single crochet, and so on.  No idea why the picture is sideways. . . .or why my forefinger looks really fat. . .

On this last round, I did bring the yarn around the handles of the bag to add a little bit more security.


And that was that!!


I am super pleased with how this tote turned out!  I'm proud that I worked through some obstacles and figured out how to fix what, a year ago, would have frustrated me into tossing another unfinished project in the closet!

Happy Crocheting!!!   


Tuesday, July 7, 2015

June Days . . .

Here's June's Breakdown . . .

1 High School Graduation
1 trip to Texas A&M for 4H Round-up
1 GT workshop
3 trips out with the kayaks
1 drive to DFW International Airport
Father's Day
1 shopping trip
1 haircut
1 crochet blanket completed
3 books read
50.7 miles run


It seems ages since I last blogged.  June has not been a restful month for me/us.  I thought once school was out it would be, but no!  I blogged earlier about the change in my job description.  I have spent numerous hours over the last few weeks studying anything art related.  I went through three different books covering history, artists, mediums, methodology.  I'm exhausted!  On top of that, I've spent a great deal of time at school cleaning out what will be my art room.   It's been hard work some days sorting through cabinets, shelves and other nooks and crannies, but I can see progress. Maintenance is painting the room today, so my next trip up I will be able to arrange the tables and make sense of the space.

I have managed some time with my family.  Father's day was spent spending time with both my dad and my father in law.  

We have taken the kayaks out a few times this month.  How utterly peaceful it is on the water; sometimes it's a little spooky--the quiet and what lies beneath the surface.  It's shark week now, but it's not sharks I fear.  It's alligators!

June flew by and I'm sure July will as well; however, I'm thinking since I have slowed down now, maybe time will too??????

Have a great week!

Saturday, June 27, 2015

Drawstring Rag Bag REDO!!!


WARNING!!  Before you attempt this, DON"T!!! Read the entire blog and then go ahead and attempt it!!  Eye-yie-yie!!  What a sewing project this turned out to be and it should have been easy!!! I will be sticking to hooking after this!  Not really, but, ugh . . .  Everything written  in red was added after I laundered this item and began to insert the drawstring.

Summer is a great time for me to try new projects, be creative and, you know, make stuff!

I like quick projects when I have other things going on, and after completing my Sunny Baby Granny Blanket, I sewed up some quilted rag letters as another gift.  The problem is I had nothing to put them in.  I thought about crocheting a basket and decided against that.  I wanted the letters to be more of a portable toy, so  . . . I searched Pinterest for ideas and came across several patterns for drawstring bags.  Not being the best at following sewing patterns, I ventured to make my own :0

Here is a somewhat step by step version of what I did.  There are a couple of things I would do a little differently, but this is what I did this time.

I started out cutting 4 12" squares.  2 pieces for the outside of the bag and 2 pieces for the lining.


The colored polka dot fabric is the lining and the white minky fabric is for the outside of the bag. I took one front panel and one back panel and placed them wrong sides together.  I did this for each "side."  I then sandwiched them together with the linings facing each other and sewed one seam down the side.


I then opened it up like a book with the right sides facing me.  Next, I cut the seam with pinking shears.


This is what gives the bag that rag effect.  On top of this, I placed a strip 4" x 24" across the top of the soon to be bag. The strip is placed wrong side up.  This will make a pocket to house the ribbon I will use as the drawstring and closure for the bag.


I sewed the seam there where my pins are.  My next step was to fold the strip an inch onto itself and then fold that down to make the pocket and also make a neat seam.  This photo is the after, but hopefully it shows what I mean with the folds.  I then used my pinking shears to cut the fabric away and to help create that raggy edge.


Once I got to this stage, I closed the book, sewed the bottom shut, and made my way around the last side. I stopped sewing when I got to the bottom of my drawstring pocket.  


I trimmed the remaining edges with my pinking shears and then when needle and thread I tacked the upper corner of the pocket.


After a quick wash and dry, I added the ribbon drawstring.began to insert a chain I crocheted out of cotton.  I got part way around the pocket and noticed a seam.  I thought to myself. "Self, you sewed through the pocket!!!  The chain can't get through!"  How frustrated I was.  I decided I would "fix" the problem.  I turned the bag inside out, folded the pocket over, and sewed around.  


So the inside became the outside and the outside became the inside.  No more rag bag :(


You want to know the real kicker?!  Upon closer inspection after I did this, the pocket WASN'T sewn through!!  It would have worked just fine had I not had my head on backwards!!  It will still hold the cute little rag letters, but I think I will save this little bag for me and start over on a new one. Then again, I may just crochet up a little drawstring bag for them.  That sounds safer :) 

Maybe I shouldn't have stopped midway through to get a manicure??????


Nahhhhhhh!!!!!!!


Sunday, June 21, 2015

Sunny Baby Granny

My first blanket completed this month and it only took a little under two weeks!  I'm calling it my Sunny Baby Granny.


Here's the breakdown on this granny:

Four colors of Peaches and Cream cotton yarn:  sunshine, white, teal, and orange.  Not sure on the exact names of the last two as I threw the paper sleeves away!  Size G hook.
There are 25 rounds of sunshine and the border consists of 7 rounds, 6 really, both beginning and ending in white. I think I would have preferred two rounds of each of these border colors, but I didn't have enough of the orange and teal yarn.  Story of my life!   Here's a close up.


The 7th round is a sweet little finish that I can't take credit for.  I found it on Pinterest a couple of years ago when looking for a final round to crochet onto some bunting.  It's very simple, but the corners give it some "umph" I think.  The pattern can be found HERE.  I don't know how, being new to blogging, to give this author a proper shout out.  The best I can do now is direct you to her blog and pattern and take absolutely no credit for the design!  If you can help me out, please comment!!

Well, this is what I did on this first day of summer; I finished a blanket.  Enjoy this summer day, and Happy Father's Day to you dads out there!

Friday, June 19, 2015

Tropical Storm Bill

Rain, rain go AWAY!!!!!

The Calm Before the Storm . . .


Beautiful double rainbow, blue skies, calm winds, and then upon waking up Wednesday morning, rain, wind, rain, rain, RAIN!!!


Our rain gauge registered 10" in a 24 hour period; however, I believe we got more than that.  The gauge was overflowing when I went out during a break in the rain to check it.  The last two photos above are pictures of the creek that runs behind our property.  I was so worried it would rise and make it to the barn and the goats, but we were lucky.  It never came past the old corner post featured above.

On Thursday, three of us went for a walk to check out the surroundings.  US 59 had been closed due to flooding up the road from us.  It was surreal to walk on the highway without any cars or sounds. Apocalyptic!  I didn't like it.


We walked over to the local park, saw a couple of kiddos fishing in the creek.  If you look, you can see one of the fishing lines.  Trash was being picked up and one of the collectors actually jumped into the creek to cool off!  It was HUMID on this morning and I'm sure it felt wonderful!


Despite the signs, I assure you, the worker didn't have to worry about hitting bottom :)

Here are some other shots of the park:


Yes, those are the trails I run and have included in other posts.  This trail was still visible in spots, but the other, longer trail on the other side of the park, was completely submerged.

We got a glimpse of the sun. . .


. . .and then the clouds rolled on in, thunder rumbled, and rain began to drop.  It was time to get home.

Later in the evening, youngest and I went on a bike ride.  She enjoyed riding on the highway with no worries just as we had walking it that morning.

US 59  is open today; I'm hoping the clouds will open up as well and bring us some sunshine and blue skies!!

Enjoy your weekend!!!


Monday, June 15, 2015

Endings and Beginnings . . .


Good Afternoon!  It is mid-June, there is a storm brewing in the gulf, and my area of South Texas is predicted to receive a good dose of rain over the next 24-48 hours.  When in a position where things need to be taken care of "just in case," I feel the need to wrap up a lot of loose ends--not just prepare for power outages and running out of milk!  That nesting thing starts happening.

Here's to endings . . .and new beginnings :)

The end of the school year was bitter-sweet for me.  My long time teaching buddy of 18 years retired. I am super excited  for her, but am really sad that our time teaching together has come to an end. Another school change came for me the last two weeks of school.  I was offered a chance to change teaching positions.  I though it over, talked it over with my husband, my kids, my teaching buddy, and I came to the conclusion that I would go for it.  After 18 years of teaching secondary English and speech classes, I have a new teaching path ahead of me:  Art, a multi-media class, and I'm taking over the publication of the yearbook.  For the past two weeks, I've been studying these:


I've covered the section on watercolor, and art through the Greek period.  I'm going to study Roman influences tonight.  It's new to me to have to study, but I'm finding it is coming pretty easy.  I'm looking forward to the change and spending my last teaching years doing something that's fun, always changing, and (I'm hoping) not as stressful.  Not that there won't be stress, but no state testing to worry about, no more LPAC meetings, not more grading essays/research papers, etc.  It was sad to leave the classroom I've been teaching in all these years; I think 15 years I've been in that room.  I remember days when my girls, the youngest especially, would nap under my desk on workdays, finish up homework after school, spend endless time writing on the white board and playing with the Elmo "teaching" those imaginary kids.  When I packed up my room and left for the last time, I cried . . .
BUT, this is about new beginnings too!!  I will have TWO classrooms, one of which is huge and has an actual office! My other classroom is next door to a kitchen, so I can brew a pot of coffee, throw something in the oven for lunch . . . lots of possibilities!  I've got two rooms to make my own and I'm ready to get started.

Another ending-----my SaMpler BlaNKEt!!!!  I finally have finished the thing and I absolutely LOVE IT!!!!!:)  I haven't even used it yet.  It's folded and on the sofa and I just stare at it, hardly able to believe that I made it.  Here's a look!


It's a pretty big blanket and I had a hard time getting the entire blanket in the shot.  I love the colors, the yarn (most of it anyway), the size, the feel of it.  I've washed it and it didn't fall apart, so I know I wove those ends in good!!!!  Here's a close up of the trim:


I wanted something fun considering all of the color and the patterns, so I settled on a little pom-pom edge.  I'm going to attempt to write a tutorial for the trim over the next week, maybe tomorrow if I'm water-logged and stuck in the house!  

With the end of one crochet project, comes the beginning of another.  Since I'm not sure what I really want to work on, and I don't really have time to invest in it now (due to my being a student again :0) I am working on a couple of baby blankets for two co-workers of mine.  I started on one a few days ago.  It's a beautiful buttery yellow cotton yarn I'm using and it's just going to be a big granny square (surprise, surprise) with a sweet little edge.  I may throw in a little beanie too.  When I finish with this blanket, I will start the second.  Here's a peek:


A toast to endings and beginnings!